Saturday, December 28, 2013

DIY Wedding Ring Holder

I have two weddings coming up next year. My brother is getting married in March and my sister is getting married in June. I made these super cute wedding ring holders for my sister and future sister-in-law.

Hobby Lobby had a 50% sale on frames, yay!!!

For this project:

  • small frames
  • satin fabric square 
  • pin
  • glue gun

I removed the glass and hot glued the pin and fabric into place. I reattached the back support and trimmed the fabric around the edges. 

Simple and cute!


DIY Name Art

To follow the whole "make your own, make it personalized" gift giving idea this year. I knew I needed to find something that was simple yet cute. I ended up with scarves for all the women in my family which were really cute and simple. But men and couple gifts were a little harder. The week before Christmas I found this website with a link to the letters and numbers to make my own name art!!!

http://fullofgreatideas.blogspot.com/2010/10/absolute-favorite-thing-i-have-made.html

Perfect!!! I love this idea!!! So simple and easy to make!!  I started off just thinking of my siblings but since it was so easy the list grew and grew and grew. I had family friends, co-workers, neighbors, all the teachers at my daughter's daycare and my friends.

Here is the link to the letters:

http://www.flickr.com/photos/lwr/collections/72157594587080023/

I chose to go to Walmart and Hobby Lobby for simple black front loading frames for the ones for my family. I chose the dollar store acrylic frames for everyone at work and at Sophia's daycare.

Here is the what the file looked liked and I just printed them out on 11X17 paper and 8.5X11 paper at home and at Kinko's.  I created them in MS Word and then saved that file as a JPEG so that I can re-size it to the frame.


These simple dollar store frames were perfect for co-workers and the daycare teachers. So cheap they can re-frame them to their taste or keep it in here since its so simple.


I used our paper cutter we bought at Office Depot and cut them to size.


So many teachers....


and more...such a small gesture for all the great work they do for my daughter and all the other kids!!


I bought some Avery Shipping Labels that I previously used to organize my craft supplies and created these cute little labels. 


Since I was DIY'ing these labels, I went ahead and personalized them with each person's name for that extra touch.


I chose to wrap these in simple glitter tissue paper. Simple and fast. 


These are framed for family members and friends. 


They were a big hit at school and at work. I definitely recommend you try it!!


Monday, November 11, 2013

Mission: Homemade Xmas Scarves!!!

Christmas is a month and a half away. Its time to start working on xmas gifts. This year, I want to stay away from stores and give something homemade. Something that even if it does not come out great, can still be used. I ended up decided on ruffle scarves for the women in my family. 

I followed this tutorial http://justanotherhangup.blogspot.com/2010/12/easy-peasy-scarf.html.  I loved how easy she made it look and I LOVE the color red!!!

I went to JoAnn's Fabrics and bought fleece in a bright color for my daughter and simple black for the gifts.

I started out making a wide 7 inch scarf for my daughter. The process WAS really super simple!!! After the test run, I decided on 3 inches by 120 inches. 


I would make the folds as I went.

 
Lots of ruffles!!!

 
I found it easier and quicker to make two folds at a time and run those through the machine.

 
This one below is the 7 inches by 60 inches.  I plan to use this one to tuck into my daughters winter vests. Its wide enough to provide maximum warmth.

 
I left a few inches at the bottom "unruffled" so that I can add her initial or rossettes.

 
Lots of ruffles.

 
And did the simple twist to give it life and texture.

 
This is the one that is only 3 inches wide. This fits my four year old perfectly!

 
She wasn't home when I was sewing, so I hung it up on the hallway door to get a sense of what it would look like.

 
I found this tutorial http://thetootsiewootsie.com/fleece-head-warmer-tutorial-with-free-pattern/ to make a fleece head warmer. Great tutorial!!! So easy to make and its matches!!!

 
The back part of the head warmer.

Sunday, August 25, 2013

Nautical Kitchen Design!

There is nothing quite as challenging and rewarding as re-designing a space! It took me weeks to pick out the paint colors in my home!!! Weeks!!! Lots of research, lot of wall samples, lot of paint stores!!  

This week I was given a great opportunity to help one of my oldest friends redesign the family kitchen and breakfast area. What started off as "I think new curtains would look great!" turned into "Check out this email, do you want this look for your kitchen?"  Luckily, I got the green light!!  AWESOME!!! This opportunity helped try out new things I had been meaning to get to....diy painted curtains!!


The look I was going for was a Nautical kitchen without the beachy feel, a little more oceanic. I wanted the room to seem manly without the "bachelor pad" feel. I kept the items minimal, and used the colors in the fabrics to really convey the room's intention. The white and blue fit perfectly with the soft beige existing color, like the color of soft sand. I kept the color pallet minimal, white, navy blue and red. By re-using the existing home items that no longer worked, I was able to personalize the space with minimal spending. Always a plus!! My challenge was: how great can this look for as little $$ as possible?

The first thing I focused on was the curtains. I thought the striped curtains would be PERFECT. They would be bold enough to make a huge statement and would be the focus of the room. I had been dying to try out the striped painted curtains. I bought Ikea's simple white drapes and hemmed them to size.


I found a few plastic drops still in the garage from when I first moved into my home, which was great!


I decided a 7 inch stripe would give me the look without seeming too modern as I think the thicker lines tend to give. I cut a simple manila folder to seven inches and marked lightly with a pencil all the way down on both sides. 

And started the taping process.  I had a long piece of  board that went from one side to the other. I placed these on the 7 inch marks which helped guide me to a clean straight light all the way across the panel.

My roommate had to practically force me to start painting. It was scary! What if it didnt work? What if I just damaged the entire panel???!?!?!?!

The best instructions I found are here:  http://abritofhappiness.blogspot.com/2013/05/diy-navy-painted-curtains.html.


The process went by smoothly. Meaure, mark, tape, press on tape X 10000, paint, peel tape and let dry.  I went with OLD NAVY from Benjamin Moore. It is the perfect shade!!  

I bought textile medium, but I was not impressed. I think I used it on the first panel only. =)


As soon as I painted the stripes, I would peel the tape. The scariest part!!!
 Next I went on to Artwork. I gathered all the extra frames I had "inherited", removed the glass and coated them all with a nice fresh clean white!
 This is by far the best coverage I have gotten! Love it!!!
 Don't they look so fresh and ready to go??!?!
 I bought a poster in Hobby Lobby and sized it to fit in this frame.
 Marked it!
 And cut! (sorry flag)
 It fixed perfectly snug!
 The finished product! In place!
 This is a before shot, with my supplies already spread out!

 And the after! ta-da! You guys should FEEL the energy in this place!! Its so light and airy! So bright! It definately looks young and modern....to me! Clean and simple but everything is to the point and has its purpose! No randoms allowed!! LOL!
I am specially happy of this wall! It ready to help the family organize their schedules and important dates!! 
 I bought these cute little guys at Micheal's.
 Attached these round "thingies" I found in the same aisle for dimension.
 And added them to the screw head.
 This area is ready for future art and planning!
 Another view of the window and frames. 
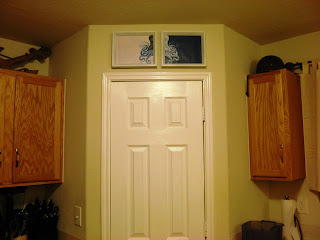
 Above the pantry door.
Overall, this was a great experience. I got to try new things and I like the finished product! Just a little effort and time changed the look of this kitchen. It is great knowing that this beautiful space is going to hold laughter and family memories! Yay!!!